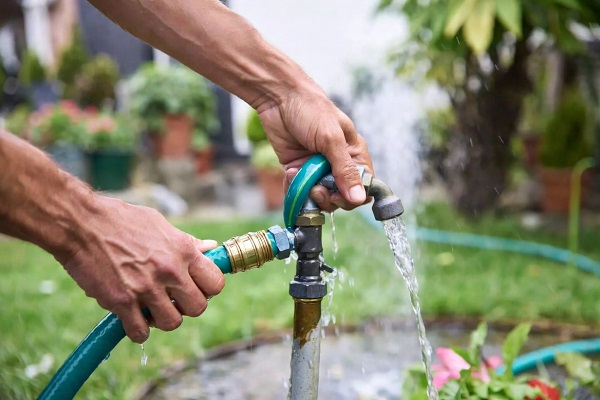
Garden Hose Connector Leaking? How to Fix It Fast
The short answer: is your leak at a connection, or mid-hose?
A garden hose connector leaking almost always comes down to one of two things: a worn or missing rubber washer, or a fitting that's cross-threaded, corroded, or physically damaged and won't seal no matter what's inside it. Unscrew the connection and check the female end first. A washer that's cracked, flattened, or missing is the cause in most cases, and replacing it is a five-minute fix. If the washer looks fine and the leak continues, the fitting itself, at the spigot, the hose's own end, or wherever a nozzle attaches, needs replacing, not re-sealing.
This page covers leaks at a connection point only: the spigot, the hose's own end fitting, or wherever a nozzle or second hose attaches. A hole or split somewhere along the hose body is a different repair, covered in how to patch a hole in a garden hose. A hose that's burst outright, cracked in several places, or gone stiff with age is a repair-versus-replace decision, not a fitting fix, and it belongs on its own page rather than a washer swap. If you haven't pinned down exactly where your hose leaks yet, start with how to fix a leaky garden hose, which sorts every leak location before you commit to a fix.
Leaking at the spigot connection
Water spraying from the seam where the hose screws onto the outdoor faucet, rather than further down the hose, is a spigot-connection leak. Two different parts can cause it, and telling them apart decides the fix.
Check the washer first. Unscrew the hose and look inside its female end for a small rubber washer or O-ring seated flat against the bottom. If it's cracked, flattened, brittle, or simply gone, that's the leak. Press a new one in with a fingertip until it sits flush, then reconnect by hand until snug plus a small nudge. Garden hose fittings use a standardized 3/4-inch parallel thread, the Garden Hose Thread standard defined by ASME B1.20.7, and parallel threads don't wedge tight the way tapered pipe threads do. That's why the washer, not the threads, is doing almost all of the sealing work at this joint.
If the washer is fine, suspect the threads. Wrap the faucet's threads two or three times with plumber's (PTFE) tape, in the direction the hose screws on, then reconnect. This helps friction and fills minor gaps, but on a parallel GHT thread it's a supplement to the washer, not a substitute for one.
If nothing seals, the fault may be the spigot, not the hose. Corroded, worn, or stripped faucet threads won't hold a seal no matter how many washers you cycle through. A gasketed slip-on adapter is a workable short-term fix; a worn hose bib itself is a plumbing repair, not a hose one.
Leaking at the hose-to-nozzle or hose-to-fitting connection
The same logic applies at the other end, wherever the hose's male end meets a nozzle, wand, sprinkler, splitter, or a second hose. Water escaping from that joint specifically, not the ground and not further up the hose, means the connection itself isn't sealing.
Washer first, again. Most nozzles, wands, and quick-connect fittings carry their own internal washer, separate from the one at the spigot end. Unscrew the attachment and check it the same way: cracked, flattened, or missing means replace it.
Quick-connect fittings add a second seal point. If you've fitted your hose with a quick-connect coupling, the O-ring inside the connector body is a separate wear part from any washer inside the attached tool. A leak that only shows up with certain attachments and not others usually points to that attachment's own seal, not the hose end.
Material matters more here than it does at the spigot. Plastic fittings crack and their threads strip more easily than brass under repeated on-and-off cycling, which is common at a nozzle connection that gets swapped often. If you're replacing a worn fitting anyway, brass vs. plastic hose fittings covers what actually changes between the two.
Cross-threading and worn ferrules: when it's the fitting, not the washer
A fresh washer fixes most connector leaks. When it doesn't, the fitting itself has failed in one of two ways, and both need the connector replaced rather than resealed.
Cross-threading happens when a connection is forced together slightly misaligned, usually from rushing the first turn or forcing a stuck fitting. It shaves or deforms the threads, and once that's happened, the two pieces can look connected while water still weeps past the damaged spot. A cross-threaded joint often feels gritty or uneven as you turn it, rather than catching smoothly the way clean threads do. Some cross-threading resolves once you back the fitting off, wipe both threads clean, and restart the connection square and hand-tight before any tool touches it. If the threads are visibly shaved or the connection never bites the same way twice, the fitting is damaged for good.
A worn ferrule is the other failure mode. The ferrule is the metal or plastic band crimped around the hose where it meets the fitting, and it's what actually holds the hose onto the connector. If that crimp loosens, corrodes, or gets bent oval, the hose can shift slightly loose inside it even while the threads on the far end look fine, and water finds the gap between hose and collar rather than at the threaded joint at all.
| Symptom | Likely cause | Fix |
|---|---|---|
| Leak stops with a fresh washer | Worn or missing washer | Replace the washer |
| Leak continues, washer looks new | Cross-threading or a worn seal seat | Realign and reconnect; replace the fitting if threads are shaved |
| Connection feels gritty or uneven turning on | Cross-threaded threads | Replace the fitting |
| Hose twists or shifts inside the collar itself | Worn or bent ferrule | Replace the end fitting |
| Leak is right at the crimp, not the threads | Ferrule seal failure | Replace the end fitting |
Neither problem is fixed by a washer, because the washer was never the seal that failed.
Step-by-step: replacing a washer
- Turn off the water at the spigot and disconnect the hose.
- Look inside the female end (the cupped side) for the washer, seated flat at the bottom.
- Pry out the old washer with a flathead screwdriver or the tip of a knife if it's stuck.
- Press a new washer in with a fingertip until it sits flush and square, not folded or tilted.
- Reconnect by hand until snug, then add a small nudge with pliers if needed. Don't overtighten. Crushing a good washer or stripping plastic threads is a common way to cause the exact leak you just fixed.
- Turn the water back on at low pressure first and check the joint before opening it fully.
An O-ring style washer generally seals better than a flat rubber one, and it's worth using if you're replacing anyway.
Step-by-step: replacing a female connector or fitting
When the washer isn't the problem, the fix is replacing the fitting itself, not the whole hose.
- Turn off the water and disconnect the hose.
- Cut off the damaged fitting close to the collar, using a utility knife or hose cutter, leaving a clean, straight cut just past the crimp.
- Confirm your hose's diameter before buying a replacement. Fittings are sized to match, and a mismatched one won't seat properly no matter how it's clamped down. Our sizing guide walks through measuring it if you're not sure.
- Push the new end fitting fully onto the hose so it seats squarely against the barb. A dab of dish soap on the barb makes a stubborn hose slide on easier.
- Tighten the clamp or crimp collar per the fitting's design, evenly, so the hose doesn't sit crooked in the collar.
- Reconnect, turn the water on at low pressure, and check the new joint before trusting it at full flow.
This is a lower-cost fix than it sounds. A replacement end fitting is inexpensive relative to a new hose, and it's the same repair whether the damage came from cross-threading, a bent ferrule, or simple age.
When it's not a connector problem after all
Not every leak near an end is actually a connection problem. A few situations that look like a fitting leak but aren't:
The leak is an inch or two up the hose, not at the joint. That's hose-body damage, a pinhole or split near the end rather than a failed seal, and it's fixed by cutting out the damaged section and joining the two ends, covered in our repair-kit guide, not by changing the connector.
Water sprays weakly through the nozzle itself, not from any connection point. That's usually a clog or mineral buildup inside the nozzle mechanism, a different problem from a leak at the joint, even though the symptom lives at the same end of the hose.
The hose leaks in three or more places, has gone stiff, or cracks along its length. At that point you're not chasing a bad fitting, you're deciding whether the hose has aged out entirely, a repair-versus-replace call that's bigger than any one connector and worth weighing on its own rather than fixing joint by joint.
A leak at a connection is, almost always, the cheapest problem your hose can have. For the wider picture on hose materials and fittings that hold up in the first place, see how to choose a garden hose.
FAQ
Why is my garden hose leaking where it connects to the spigot?
Almost always a worn or missing washer inside the hose's female end. Replace it first. If the washer is fine and the joint still weeps, wrap the faucet threads with plumber's tape; if nothing seals, the faucet's own threads may be worn or stripped.
How do I know if my hose connector is cross-threaded?
The connection feels gritty or uneven as you turn it, rather than catching smoothly, and it may never seal the same way twice even with a fresh washer. Back it off, clean both threads, and restart the connection square and hand-tight. If the threads are visibly shaved, the fitting needs replacing.
Can a cross-threaded hose fitting be fixed, or does it need replacing?
Sometimes a mild cross-thread resolves once you realign and restart the connection cleanly. If the threads are visibly damaged or shaved down, no amount of realigning fixes it, and the fitting has to be replaced.
What size washer does a garden hose connector use?
Garden hose fittings use a standardized 3/4-inch thread under the Garden Hose Thread standard (ASME B1.20.7), so a common multipack of hose washers fits nearly all US hose connections, regardless of the hose's own diameter.
Is a leaking hose connector a sign I need a new hose?
No, on its own. A fitting or washer failing at one end is a cheap, isolated fix, not a sign the hose itself is failing. A hose only needs replacing when the leaks multiply across several points, or the material itself has gone stiff or cracked.